Thursday, February 26, 2015

Love Your Guided Reading Setup with These Tips!

  
After many attempts at different arrangements, I have finally found one I love. My goal is to have everything organized and easy to get to for myself and students.
 

 Each student has supplies above their dry erase dot. I teach them from the beginning to put the erasers on the outside and pencil and marker on the inside before leaving the table. These mechanical pencils are different than any they have and the thicker lead makes them perfect for young students. I have them use the eraser provided to save the eraser on the pencil.


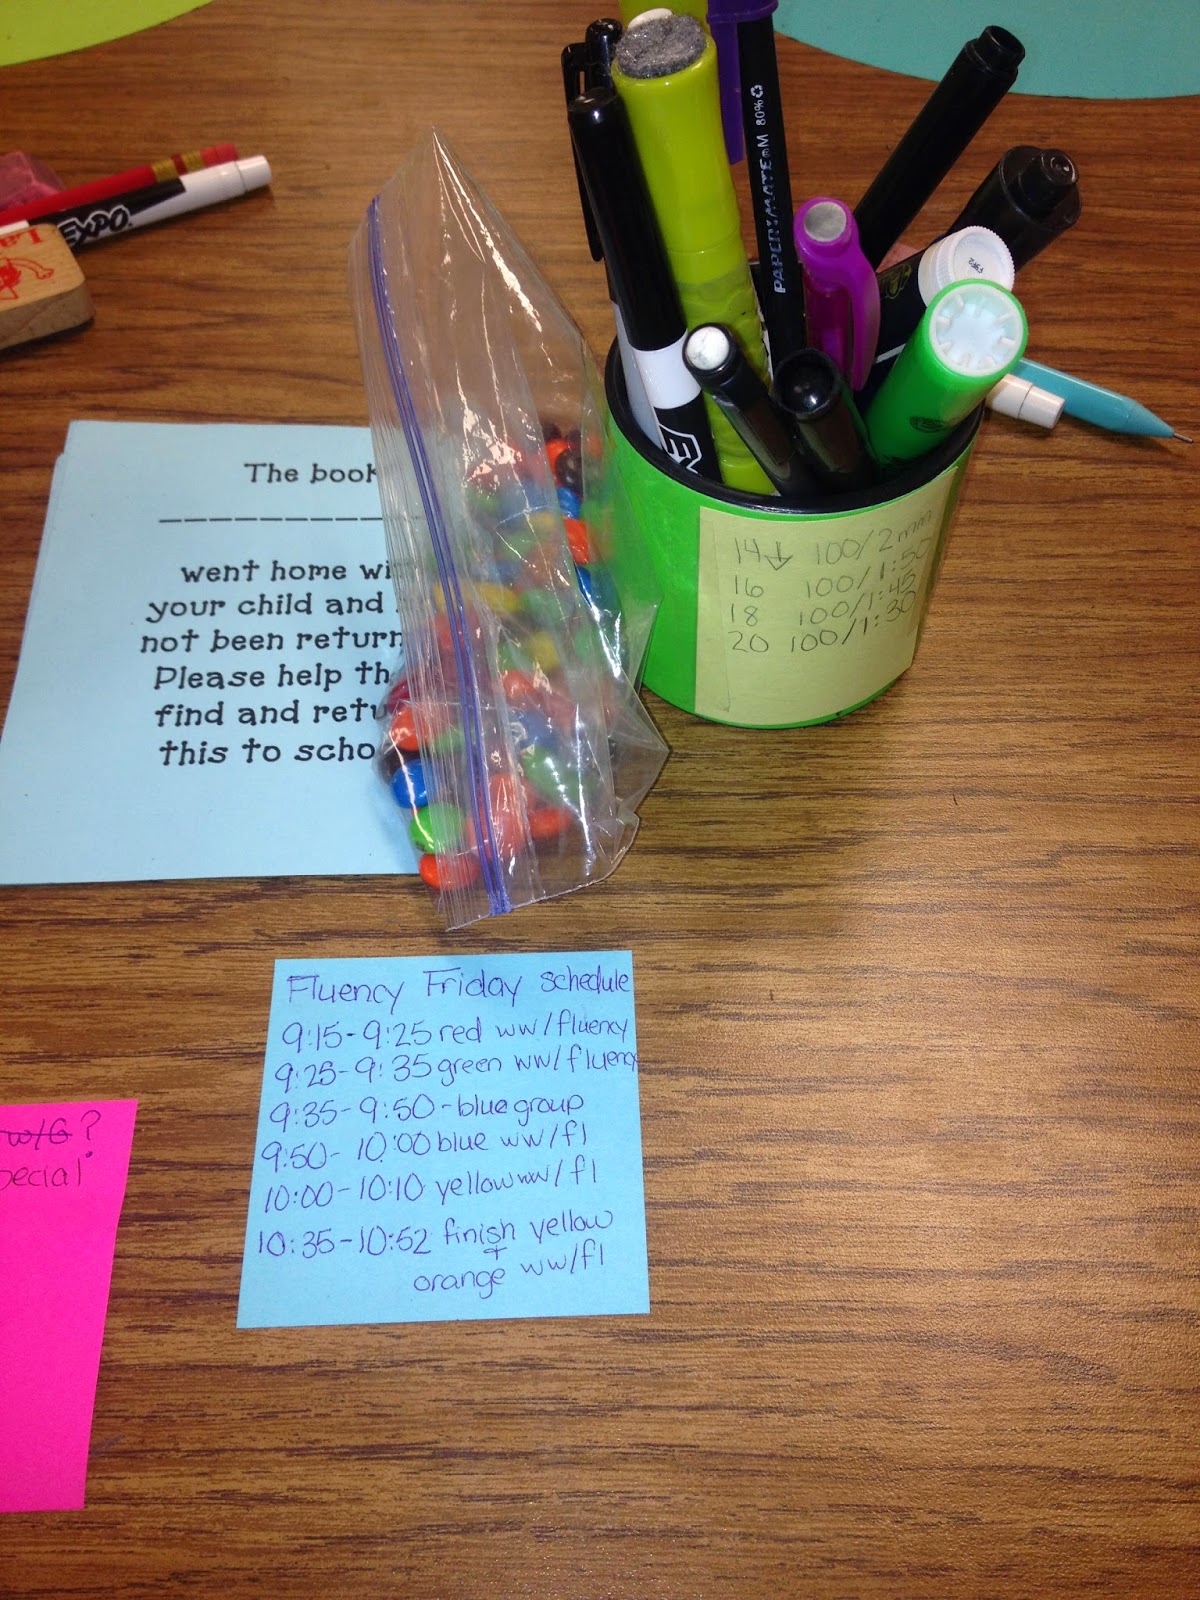
I keep a pop up dispenser of sticky notes because on Monday I put a sticky note on the inside cover of each students book. This makes it really easy for me to see if it has been read. I highlight the parent signature each day and the student gets one M&M if it was read. I write a M, T, W, T on it to show the night it wasn't read. I put a star on their chart if it was read all four days. We switch the sticky note over when we switch books on Wednesday. I also have a little note to send home if the book didn't make it's way back to school. Also, I keep a list of missing books on the sticky note. In my cup I have extra supplies and my writing utensils. On the outside of the cup, I have a list of words per minute expectations at different levels so I can quickly reference it. I use the flag sticky notes for a couple different things. Sometimes we have long books that I let them start from where they got to during the guided reading time at home so it doesn't take as long. Also, during chapter books we may split the book between the beginning and end of the week so this can show the stopping point.


 I have a file organizer directly beside me. In the front, each group has a folder. They are in the order we meet. Inside there are the two lessons, fluency Friday passages, and materials for the week. I just rotate the first book's lesson to the back when we finish. Then I have a Tuesday and Thursday folder. This is because I do running records on those days. In each folder, the running records are in order by group. This makes it easy for me to pull out the stack and just rotate through them. I do every student each week and this makes it easy to get through them quickly. Also, I can put them all in my assessment binder and switch for new ones at the same time. (I added a 100 grid to my running record form that makes calculating percentage a breeze.) Then I have space for my word work booklet. At the back I keep clear pockets to lay over word work sheets so they become reusable. I also have a white board with a stand for myself.  


Beside my file folder I have a shelf with magazine holders to hold the books for the week. They are color coded to go with the groups. I know some like to name the groups different things, but I find going through the rainbow/lowest to highest is he easiest way to keep track. 
 

This is all of my word work. Not liking to come up with word work all the time, I created the Ultimate Word Work Pack for Guided Reading and Small Group with over 500 pages of activities. Follow the link to check out the free mini pack. These activities don't require any preparation after printing. (There are some word ladders that you cut the directions off and cut the sheet in half, but that is very quick.) I use them under the dry erase pockets so I never have to print new ones. Included is a page by page table of contents so you can keep track of what ones are done. I write the book level and part of the title. I keep my lessons and word work separate so I can use it for small group RTI as well, but you could store the word work with the lessons. 
 

 I print six of each activity and paper clipped them together before putting them in the binder. When I plan my guided reading for the next week, I clip the lesson to the front of the word work and place in it's folder.


Sunday, September 22, 2013

Guided Reading Space Saver!

In the past, I have used guided reading baskets that go back and forth to the table, but I hate that they are on the floor. I have added several things to my table this year so I figure I might as well add something else. I bought the poly envelopes for binders and there is a guided reading notebook inside. The student's familiar reads will also go in here.

Then I added good quality velcro to the bucket and to the back of each envelope. I have plenty of just one side because year after year I leave one side on the student desks so I only use the other side for the name tags. The students know to hang it on the bucket when they get to group. It has been easy to get in and out of and it stays on. I just have them stick it under where their legs are. I did the wiggle and slide test myself and it sticks tight. I used velcro out of the sewing department. Be sure you are at the blog Home tab for more guided reading table ideas!


Sunday, September 8, 2013

Who's Out of Class?

This year I have more students than ever coming and going. Some are daily, but others are just a couple times a week. It can be a lot to keep track of. Also, there are the times that aren't scheduled. So I decided to create an easy way to track my students in the building. I created a couple versions of this sheet and there is an editable version.You can download it for free at TPT.
In my class, the students know their numbers and use them all of the time so they can add their own number inside of the appropriate box. For my special needs pull outs, I added their names and numbers at the bottom so their teachers could write it for them or help them. This is laminated and hung on the wall right outside of my classroom. For the marker, I just stuffed and covered the end with felt using my hot glue gun to make an eraser. Then I cut off the scrap. Then I added velcro to the sheet and marker so it could hang there.  


Thursday, August 22, 2013

Guided Reading Table Upgrades!!!

I have added a couple new things to my guided reading table this year. They are cute AND make life easier!
 I am super excited about my new dry erase circles. I got these Wall Pops from amazon at about $9 for a set of three. I went with the two colors for added fun! They erase really easily and no more passing out boards or trying to work around them! You can reposition them if needed. When I put them on, I just pulled back on side of backing laid that down and slowly peeled the backing away as I put it in place. I figure that is easier than working with the whole thing at once.

Also, I have my bucket lids all finished! I'll be honest my husband did part of the work and my mom the rest so I don't know all the details, but I will share what I know. I got the buckets from Lowes along with a sturdy plywood, screws, and wood glue.  You cut out two circles per bucket. One circle is smaller than the bucket top so it fits inside to prevent slipping. (leaving room for the fabric and vinyl to fit in there too) The other circle is bigger so it will sit on top. You then glue and screw a small to a big. Then you put the stuffing on the bigger circle and cover it with fabric. Staple the fabric to the underside of the seats. Then you go back and add the vinyl covering. Trim off any remaining plastic and fabric. I added a supply list below. 

Using the Buckets:
I made large shipping labels for my buckets. 
Students 1-5, students 6-10... and Pencils
Each student has a gallon baggie with their name on it inside the bucket that goes with their class number. I sat this up on open house so the parents could help and it worked really well. Now they have a place for those extra supplies without it taking up more cabinet space and they make great guided reading chairs. ( You don't want to try slouching on those!) I keep the pencils because I have a pencil system that requires me to pass out pencils.


buckets
plywood
screws
wood glue
stuffing
vinyl "material"? from the sewing section You want a thicker one so it will last
fabric ( 21"x18" will cover a seat) I got mine from the pre-cut material at Wal-Mart
staple gun with staples

Monday, August 19, 2013

101 not 1001!

         
          According to common core, students need to write to 120. I want them to practice this throughout the year, but we don't get into place value until later. Many times I get 1001, 1002...10013 or something like that. I just wanted an easy way for them to practice those 100+ numbers so I put them in a trace format. I hope that others find this useful too.

Sunday, August 18, 2013

Back To School Sale!!!

      I have just finished my first partial week of school and am getting ready to head back for the first full week! I hope those of you who are already started are having a great year and the best of luck to those who haven't. The Back-To-School sale is an exciting one! It is the beginning of a new adventure where we get another chance to change lives!  My store is on sale for the next few days! Also, please follow me on blog lovin'! (check out the sidebar) This year, I want to offer a free sheet or two to go with some of each month's Scholastic dollar books and I would love to share those with as many as possible! Have a fantastic year!